목차
1. 구글 코랩 GPU 사용 가능?
torch.cuda.is_available()- jupyter 노트북에서 바로 하는 방법 발견 못함
- 쉽게 그냥 코랩 이용하면 됨
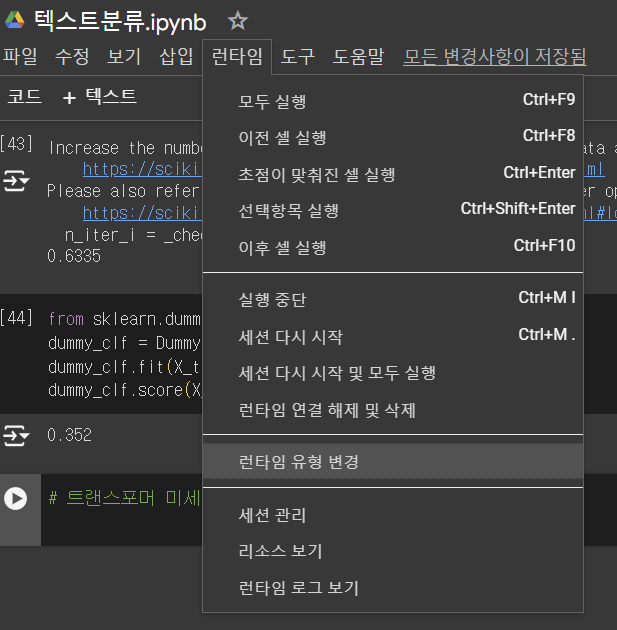
런타임 > 런타임 유형 변경 >T4 GPU NLP 사용 좋음
- T4GPU 범용적고 파이토치, 모델 추론에 적합
- TPUv2는 텐서플로 모델의 대규모 학습에 탁월하며 대형신경망 모델 훈련에 강력함
- 다만 시간/용량 제한이 있음(매일갱신)

2. 텍스트 분류 모델 훈련
# 텍스트 분류 모델 훈련을 위한 데이터 만들기
# 머신러닝 텍스트 분류 모델은 입력 값을 숫자 벡터로 받기 때문에 내가 가진 데이터 그대로를 입력값으로 넣을 수 없음
# 사전 학습된 모델을 이용해 은닉상태(임베딩)을 추출하여 그것을 입력으로 넣어야 함.
2-0 사용 모델
# Automodel 모델
# AutoModel 클래스는 토큰인코딩 >임베딩 > 인코더 스택 >은닉 상태 반환
from transformers import AutoModel
import torch

model_ckpt= "distilbert-base-uncased"

# 파이토치로 GPU 사용 여부 체크. to() 메서드를 모델 로드에 이어 호출함
device = torch.device("cuda" if torch.cuda.is_available() else "cpu")
model = AutoModel.from_pretrained(model_ckpt).to(device)
# tokenizer 모델
from transformers import AutoTokenizer
# 사전 훈련된 모델에 연관된 토크나이저를 빠르게 로드하는 클래스 : AutoTokenizer
# checkpoint 이름 사용해 모델, 가중치, 어휘사전 자동 추출하는 자동 클래스.
# 다양한 모델에 대해 자동으로 올바른 토크나이저 선택해주는 유연한 클래스.
# 특정 모델을 지정하면, 해당 모델에 맞는 적합한 토크나이저를 로드함
model_ckpt = "distilbert-base-uncased"
# model_ckpt = model checkpoint : 모델 학습 중간에 저장된 상태, 모델의 가중치(weights), 학습상태, optimizer parameter 등 저장
tokenizer = AutoTokenizer.from_pretrained(model_ckpt)
# from_pretrained() : 허브의 모델ID나 로컬 파일 경로와 함께 호출하기
2-1 간단한 한 줄 입력값 바꾸기
Do you understand?
# return_tensors="pt" 형식 바꾸기
# 파이토치
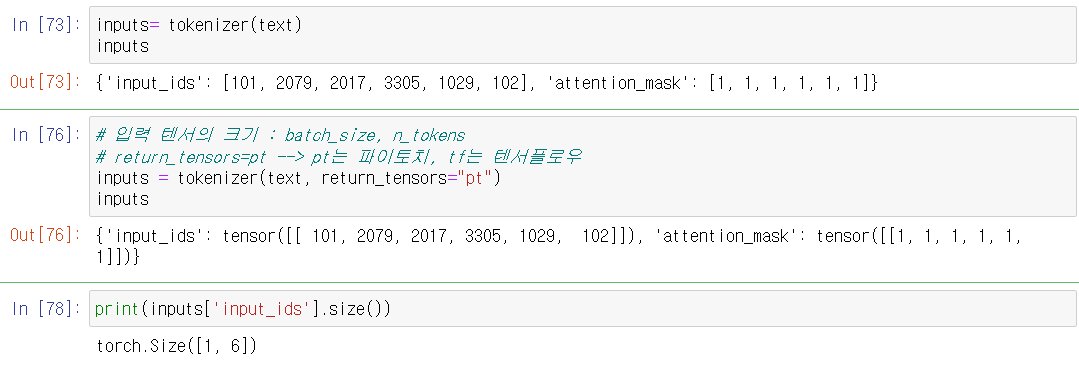
text= "Do you understand?"
# 입력 텐서의 크기 : batch_size, n_tokens
# return_tensors=pt --> pt는 파이토치, tf는 텐서플로우
inputs = tokenizer(text, return_tensors="pt")
inputs
< 참고 >

# BERT 모델에서 은닉 상태(임베딩) 추출!!
# with 구문, no_grad, **input
## with 구문은 특정 코드 블록을 실행할 때 자동으로 설정된 내용이 적용되도록 함
## no_grad : 기울기 계산 하지 않음= 역전파 하지 않음 --> 평가/추론/예측 단계에서 기울기계산 안함
## **input : 딕셔너리언팩킹 : 딕셔너리의 키-값 쌍을 함께 개별인수에 전달함
## ex) input_ids=tensor1, attention_mask= tensor2 처럼 호출
with torch.no_grad():
    outputs = model(**inputs)
## output은 마지막은닉상태(last_hidden_state) 보여줌
print(outputs)
BaseModelOutput(last_hidden_state=tensor([[[-0.0920, 0.0710, 0.0199, ..., -0.0792, 0.1890, 0.2432],
[ 0.4139, 0.0932, -0.2574, ..., -0.0852, 0.7838, -0.0731],
[-0.1637, -0.3522, 0.4522, ..., 0.2221, 0.2943, -0.3906],
[ 0.4398, 0.0859, -0.0305, ..., -0.4032, 0.2261, 0.0762],
[-0.1217, -0.2575, -0.5711, ..., -0.2954, 0.3912, 0.3098],
[ 0.9325, 0.2362, -0.3414, ..., 0.1219, -0.6029, -0.4163]]]), hidden_states=None, attentions=None)
# 6개의 입력토큰마다 768차원의 벡터가 반환됨
# size()
outputs.last_hidden_state.size()
outputs.last_hidden_state[:,0].size()
torch.Size([1, 6, 768])torch.Size([1, 768])
2-2 전체 데이터셋 토큰화
# emotion dataset
from datasets import load_dataset
emotions = load_dataset("emotion")
emotions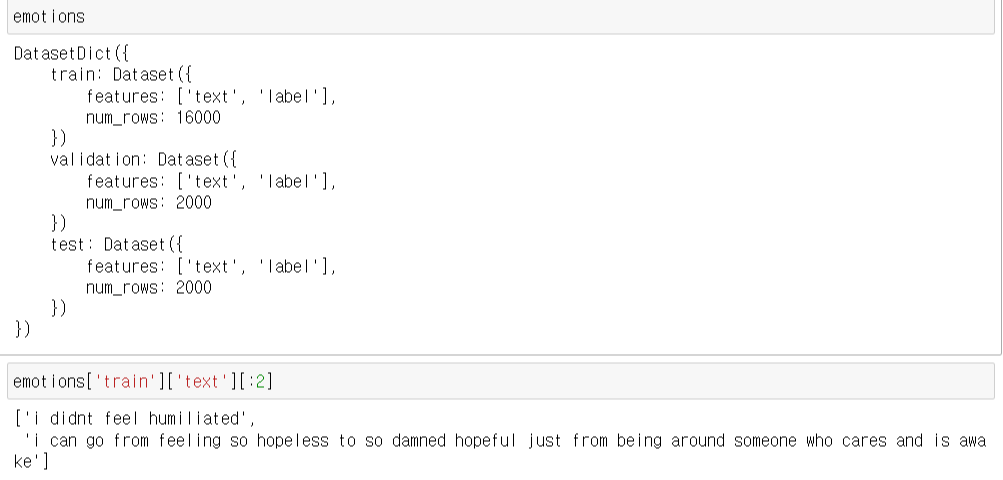
# 토큰화
def tokenize(batch):
    return tokenizer(batch["text"], padding=True, truncation=True)
# padding : 배치에 있는 가장 긴 샘플 크기에 맞춰 샘플을 0으로 패딩 -> 길이 동일하게 맞춤
# truncation : 모델의 최대 문맥 크기에 맞춰 샘플 자르기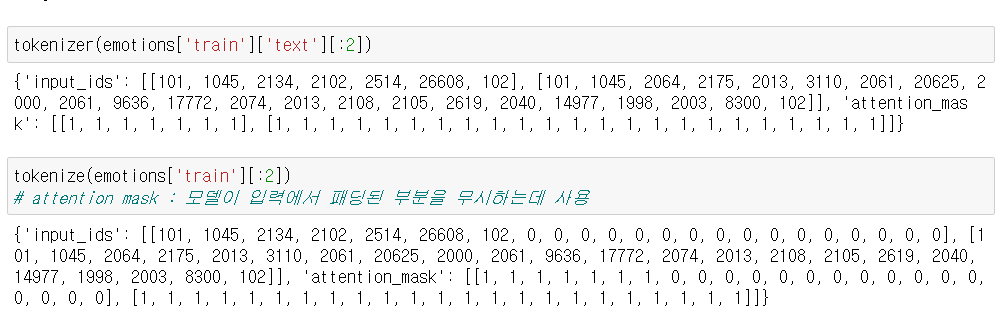
# mapping
- map함수가 자동으로 batch를 전달해줌.
- batched= True 한 번에 여러 샘플이 묶여서 batch로 전달
emotions_encoded = emotions.map(tokenize, batched=True, batch_size= None)
# batch_size = None  배치 사이즈가 전체(1개)
# emotion dataset에 input ids와 attention mask열을 새롭게 추가
DatasetDict({
train: Dataset({
features: ['text', 'label', 'input_ids', 'attention_mask'],
num_rows: 16000
})
validation: Dataset({
features: ['text', 'label', 'input_ids', 'attention_mask'],
num_rows: 2000
})
test: Dataset({
features: ['text', 'label', 'input_ids', 'attention_mask'],
num_rows: 2000
})
})
# 형식을 torch에서 쓸 수 있도록 바꾸기 set_format
emotions_encoded.set_format("torch", columns =["input_ids", "attention_mask", "label"])
# 마지막 은닉상태 추출 함수
- last_hidden_state : 최종 레이어의 출력값
- 형태-> batchSize, sequence_length, hiddenSize
- CLS token : BERT 모델에서 입력 문장의 첫 번째 토큰은 항상 cls 토큰임. 문장 전체를 요약하는 정보로 많이 사용됨.
- CLS 토큰이 문장 전체를 요약하는 역할을 하므로 문장 분류나 텍스트 분류 작업에서 문장 전체를 대표하는 임베딩으로 사용하도록 설계함
- [:, 0] 배치 전체에서 모든 문장을 선택, 각 문장의 첫 번째 토큰 선택, 토큰의 임베딩 벡터 768차원 선택
# 마지막 은닉상태 추출
def extract_hidden_states(batch):
    # model입력을 gpu로 옮기기
    inputs= {k:v.to(device) for k,v in batch.items()
            if k in tokenizer.model_input_names}
    # 마지막 은닉 상태 추출
    with torch.no_grad():
        last_hidden_state = model(**inputs).last_hidden_state
    # cls token에 대한 벡터 반환
    return { "hidden_state": last_hidden_state[:, 0].cpu().numpy()}
# 은닉상태 추출
# 기본 cpu로 시간 엄청 오래 걸림/ batch_size 기본은 1000
# jupyter에서는 못돌리고, 구글코랩을 쓰거나 그래픽카드 좋은 컴퓨터에서 써야함
emotions_hidden = emotions_encoded.map(extract_hidden_states, batched=True, batch_size=1000)emotions_hidden['train']Dataset({
features: ['text', 'label', 'input_ids', 'attention_mask', 'hidden_state'],
num_rows: 16000
})
# 훈련 데이터로 바꾸기
-파이토치/텐서 --> 넘파이로 바꾸기
import numpy as np
X_train= np.array(emotions_hidden["train"]["hidden_state"])
X_valid= np.array(emotions_hidden["validation"]["hidden_state"])
y_train= np.array(emotions_hidden["train"]["label"])
y_valid= np.array(emotions_hidden["validation"]["label"])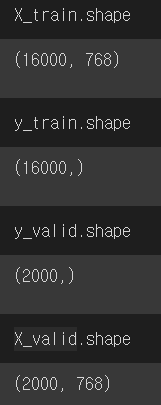
# 머신러닝 모델로 학습
from sklearn.linear_model import LogisticRegression
# max_iter 최대 반복 횟수 -> 반복 횟수가 너무 작으면 모델이 경사하강법의 최적의 해에 도달할 수 없음.
# 기본값은 100임
lr_clf = LogisticRegression(max_iter=1000)
lr_clf.fit(X_train, y_train)
lr_clf.score(X_valid, y_valid)
>> 0.6335
# 비교군: 마구자미 더미 클래스에서 가장 빈도가 높은 것을 답으로 정함
from sklearn.dummy import DummyClassifier
dummy_clf = DummyClassifier(strategy="most_frequent")
dummy_clf.fit(X_train, y_train)
dummy_clf.score(X_valid, y_valid)
>> 0.352
---> 이러한 결과를 통해 해당 성능이 좋다는 것을 알 수 있음
2-3 테스트 데이터 입력하여 예측하기
test = "I love you and thank you so much."
test_token = tokenizer(text, return_tensors='pt')
{'input_ids': tensor([[ 101, 2079, 2017, 3305, 1029, 102]]), 'attention_mask': tensor([[1, 1, 1, 1, 1, 1]])}
test_input = {k:v.to(device) for k,v in test_token.items()}{'input_ids': tensor([[ 101, 2079, 2017, 3305, 1029, 102]], device='cuda:0'),
'attention_mask': tensor([[1, 1, 1, 1, 1, 1]], device='cuda:0')}
with torch.no_grad():
      outputs = model(**test_input)
      last_hidden_state = outputs.last_hidden_state
      cls_embeddings = last_hidden_state[:, 0, :]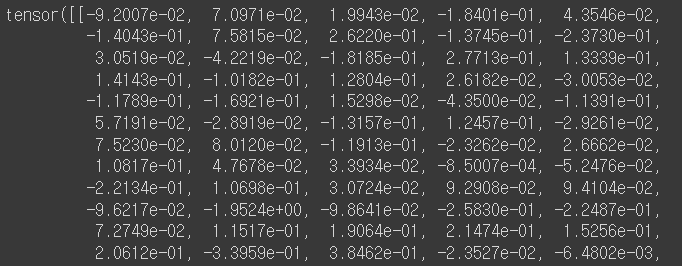
cls_embeddings.size()torch.Size([1, 768])
cls_embeddings = cls_embeddings.cpu().numpy()
cls_embeddings
- 임베딩은 파이토치텐서로 모델을 gpu에서 실행할 때 gpu 메모리에 저장되기 때문에 cpu에서 사용하기 위해서는 cpu메모리로 변환하는 과정이 필요함
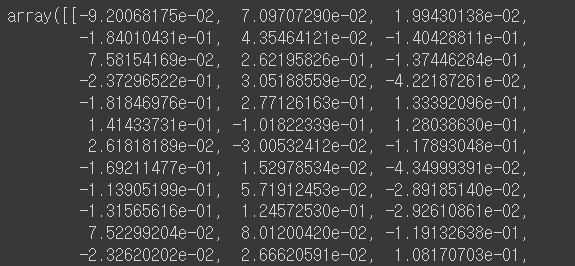
lr_clf.predict(cls_embeddings)예측값 확인할 수 있음!